Watercolor Text Effect Using Photoshop Brushes and Layer Styles

Photoshop brushes provide a quick and easy way to add a handmade look to your designs.Some of the most popular brushes are watercolors, acrylics, and other types of paint.
Transforming traditional art media into a digital form allows us to give our work a welcoming personal touch.
In this tutorial, we will show you how to use different Photoshop brushes to create a watercolor text effect. Let's get started.
What We Will Be Making
Step 1
Create a new document with dimensions of 1920 x 1200 pixels. Unlock the background layer and fill it with white, then apply the following Layer Style settings.
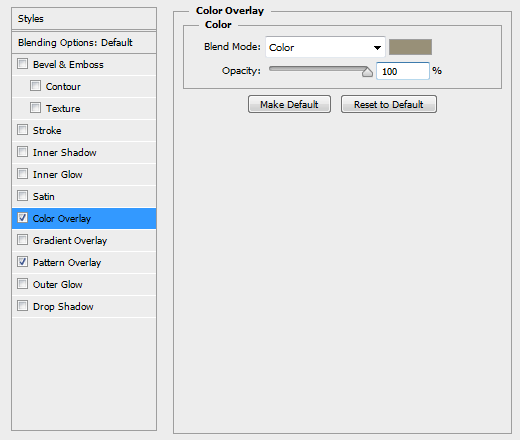
We used this seamless natural paper pattern for the Pattern Overlay.
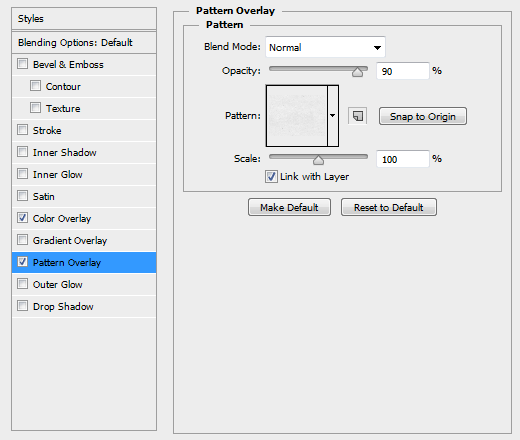
This gives us a nice paper surface to paint on.

Step 2
Optionally, you can copy and paste a more patterned texture into your document.
We used our Striped Paper Texture 11 with the Blend Mode set to Overlay, and the Opacity set to 50%.
You should end up with something similar to the image below.

Step 3
To add some more depth, we painted on a watercolor brush stroke using brush 25 from our Watercolor Strokes Brush Pack 1.
You can download a 1,000 pixel resolution version for personal use only here.
Set the Blend Mode to Overlay and the Opacity to 50%.

Step 4
Create your title text using the font Lavanderia, set the Fill to 0% in the Layers palette, and apply the following Layer Style settings.
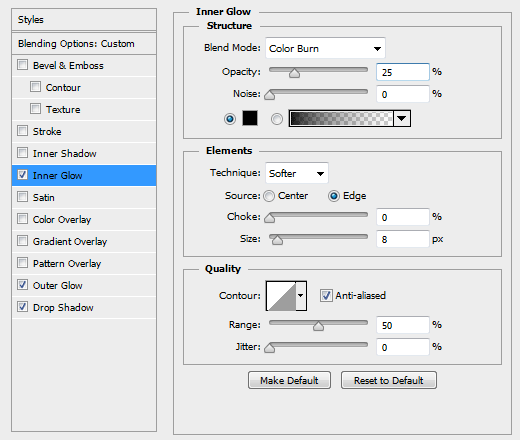
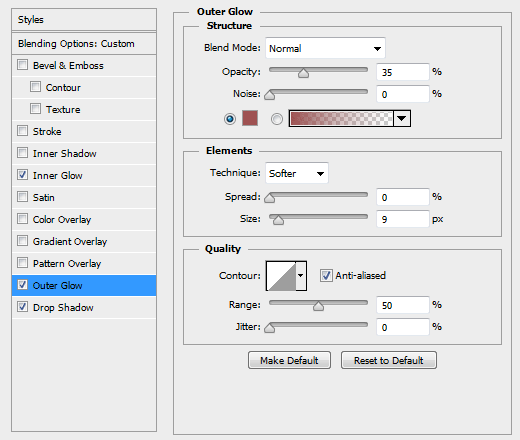
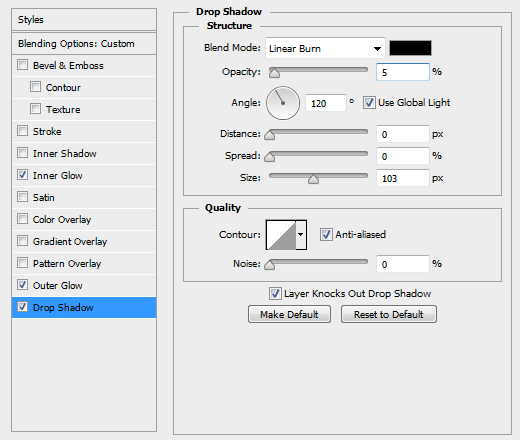
You should end up with something similar to the image below. It's not much yet, but this is the basis for our watercolor effect.

Step 5
Create a new layer, and with the new layer still selected, CTRL + Click on the thumbnail of your title text in the Layers Palette to make a selection. Using the same watercolor brush as in step 3, paint the inside of your selection with black.
To get the best effect, just click the brush a single time so that it covers the entire line of text, do not click and drag.
Press CTRL + D to clear your selection. Apply the following Layer Style settings to your newly created layer.
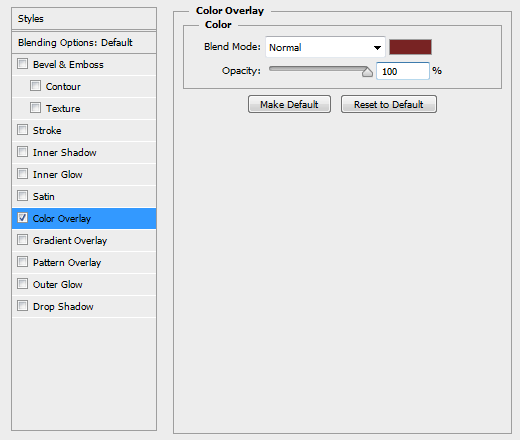
You should end up with something similar to the image below. Now that's looking more like paint!

Step 6
Repeat the same process for any other text or elements you want to add. By painting black and using Layer Styles to color our effect, we can go back and change the color at any time.
We used the font Franchise for the URL.

Step 7
We used 5 additional brushes from our Watercolor Strokes Brush Pack 1 and painted them at the bottom of the canvas on a single layer.
Apply the following Layer Style settings to give it a blue color.
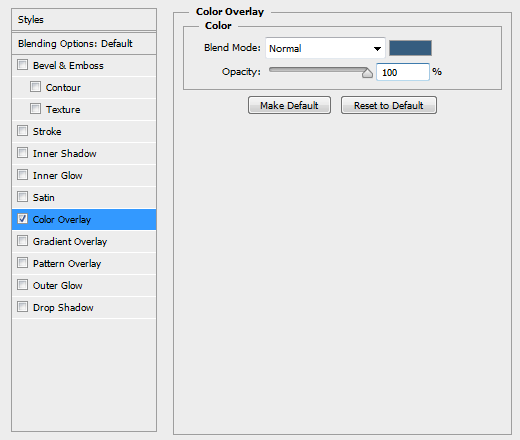
You should end up with something similar to the image below.

Step 8
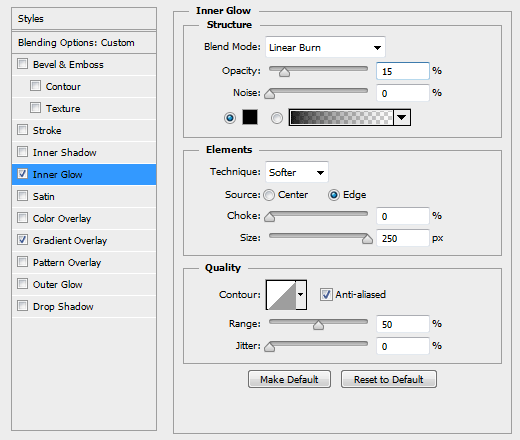
Finally we will add some lighting effects.
Create a new layer above all the rest and fill it with any color.
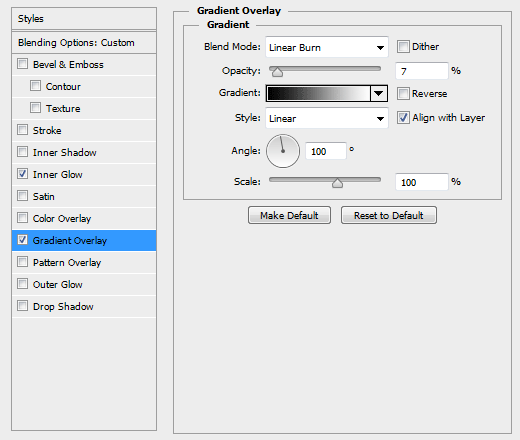
Set the Fill to 0% in the Layers palette and apply the following Layer Style settings.
Final Image
What other uses for Photoshop brushes have you seen? Share your work with us on Facebook!

