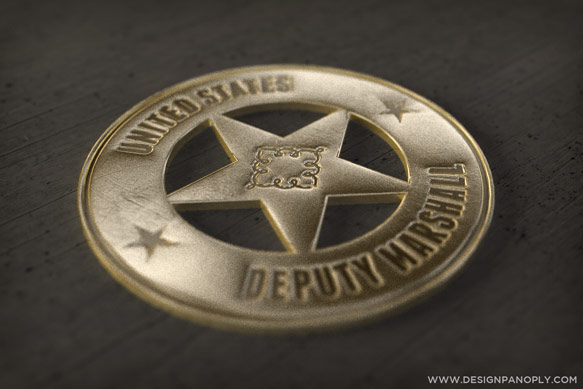
Create a Realistic 3D Old Western Badge in Illustrator and Photoshop CS6
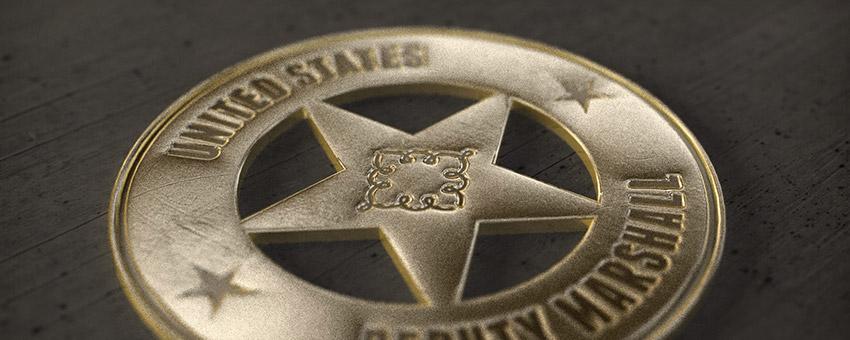
The 3D features within Photoshop are becoming more and more useful with every release, and you would be wise to start learning the basics now. Gone are the days where you needed $10,000 software to create a decent looking 3D render, and I can prove it.
This tutorial will teach you how to create a realistic 3D old western badge using Illustrator and Photoshop CS6. Let's get started.
Before We Begin
You can follow this tutorial completely in Photoshop, but the first steps are more easily completed in a vector editing program.
To keep the focus on learning the 3D aspects of Photoshop CS6, some of the most basic instructions may be left out. Don't let that stop you, if you get stuck, Google will help you find what you need to know in just a few minutes.
This tutorial assumes that you have basic knowledge of Photoshop and Illustrator, including working with vector shapes, the Pathfinder palette, and type on a path.
Important: The 3D workspace within Photoshop CS6 still has some bugs and can crash randomly. I recommend you save early and often. A quick CTRL + S after every step only takes a fraction of a second. If anything weird starts happening, I recommend you close Photoshop, reload your saved file, and continue from your last save.
What We Will Be Making
Step 1
The first thing we need to do is create a vector shape in Illustrator to bring into Photoshop. A Google image search for "old western badge" brings up a lot of inspiring ideas.
To create the shape for our badge, we used simple circles, the star tool, and some type on a path for the top and bottom text. We also added a little extra vector flourish to the center star for some additional detail.
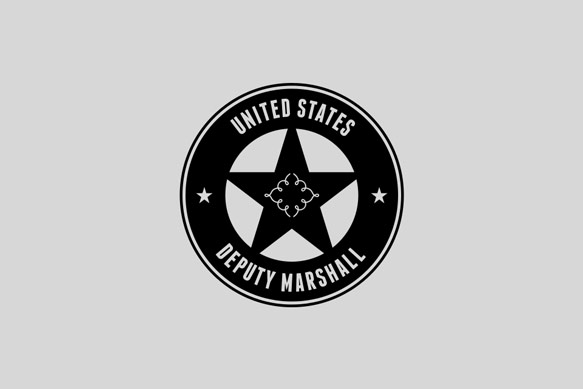
Expand your text and any other strokes if necessary until everything is an outline. Use the pathfinder tool to boolean add and subtract your shapes until you have a single object.
You should have something similar to the image below.

Step 2
The white areas in the shape above will be open space after extruding the shape, but we want parts of our badge to look like it has been stamped.
To do this, make a copy of your shape and delete all of the details where you want the stamped look to be, leaving any white space where the 3D shape will be open.
Once you have the overall shape, click Object>Path>Offset Path and use a negative value to shrink your shape slightly. The reason for this is that Photoshop will do some weird stuff if you have two extruded shapes whose edges are exactly aligned, so we are creating a slightly smaller shape that will sit inside the bigger one.
The red overlay in the image below shows our smaller shape. Notice how it covers the text, decorations, and any other white areas that we want to look stamped, but leaves the white space around the main star so it will be open once it gets extruded.

Step 3
Create a new document in Photoshop. Our final document is 1920 x 1280 pixels so we can use our final image as a desktop background. If you want to have shorter render times while you work, you can start at 960 x 640 pixels and resize it when you are ready for your final render.
Unlock the background layer and fill it with a light gray.
Copy your first shape from Illustrator to Photoshop. Make sure you paste it into your document as a Shape Layer. It will take on whatever color is set as the foreground color at the bottom of your main toolbar, so set this to black if it isn't already.
Do the same with your second shape. Hide your less detailed shape by clicking the eye icon in the Layers palette.
You should have something similar to the image below.
Step 4
Now comes the fun part as we jump into 3D space!
With your shape selected, click 3D>New 3D Extrusion from Selected Layer. This will bring up the new 3D workspace.
Click on your new 3D object to display its Mesh properties in the Properties palette and set the Extrusion Depth to 10.
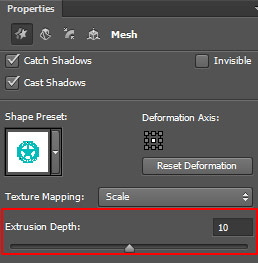
Click back over to the Layers palette.
You should end up with something similar to the image below.
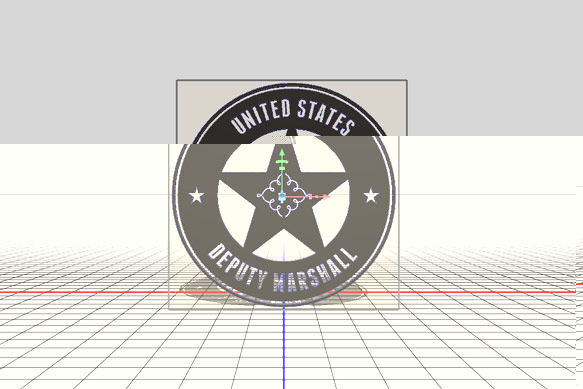
Step 5
Select your hidden layer and unhide it. Once you click on a regular layer, you will notice the 3D workspace seems to disappear. Don't worry, this is normal.
With your second Shape Layer selected, once again click 3D>New 3D Extrusion from Selected Layer.
Again set the Extrusion Depth to 10, then click back over to the Layers palette.
You should end up with something similar to the image below.
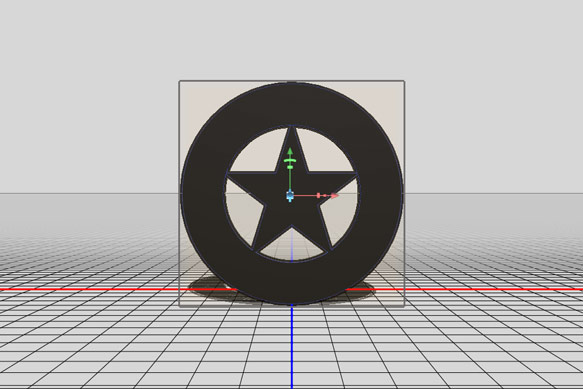
Step 6
Right now, each 3D layer is in its own 3D space with separate lighting and they will not interact with each other. In order to get our two 3D objects to interact, we must combine them into a single 3D space.
Select both of your 3D layers in the Layers palette, and click 3D>Merge 3D Layers.
Click over to the 3D palette, and you will now see that you have two objects within your single 3D layer.
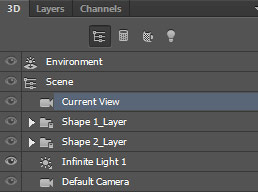
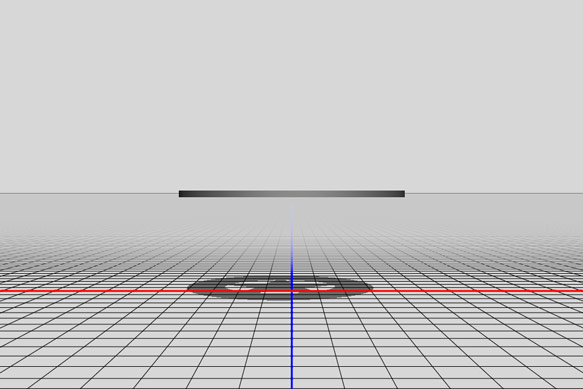
Hold Shift to select both 3D objects in the 3D palette, and make sure you have the Rotate tool selected under 3D Mode. The 3D mode can be selected in the top horizontal toolbar of Photoshop only when you have the Move Tool (V) selected in the standard vertical toolbar on the left.

In your 3D workspace, move your cursor near the top line of the bounding box around your 3D objects until it says "Rotate Around X Axis". Click and hold, then press CTRL to lock your rotation to 5 degree increments, and drag upward until you reach 90 degrees.
If that sounds confusing, then know that all we are trying to do is rotate the objects by 90 degrees so they are parallel with the ground.
You should end up with something similar to the image below.
Step 7
Click on any blank area within your 3D workspace, then click again and drag to rotate the camera around to get a better view.
Select your two 3D objects again and hover your cursor over the top plane of the bounding box around your objects until it says "Move on Y Axis". Click and drag to move your 3D objects until they are sitting right on top of the ground plane.
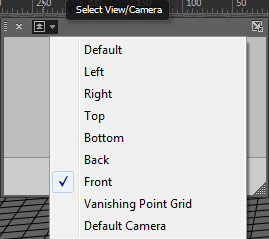
It can be tough to see in your camera view, so you may want to use the secondary camera window (in the top left corner of your 3D workspace), set to the Front view, in order to get it to sit flat on the ground plane.
It doesn't have to be exact, but get it as close as possible.
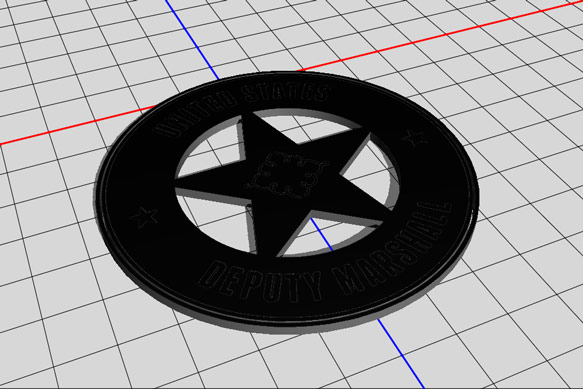
Use the other 3D Mode tools to rotate, pan, and zoom your camera around until your 3D objects are in the center of your view.
You should end up with something similar to the image below.
Step 8
Next we will set up our basic 3D environment settings.
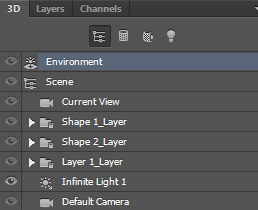
Click the Environment layer in your 3D palette, and using the following settings for your Environment properties.
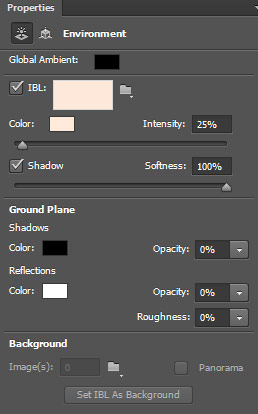
Step 9
Hide the layer for your less detailed shape by clicking the eye icon in the 3D palette. You must have your 3D layer expanded to see the clickable eye icon.
Select the 3D Mesh for your main layer by clicking the layer as shown below.
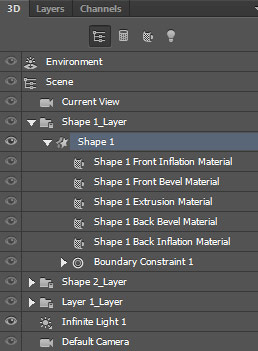
We want to bevel the edges of our 3D object, as well as give the front face a little roundness so that it is not completely flat.
Apply the following settings to the Deform and Cap subsections in the Properties palette.
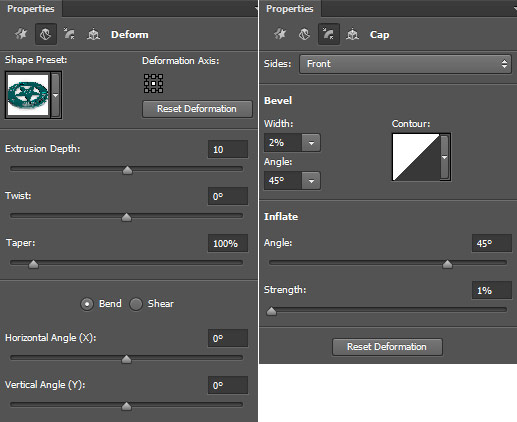
You should end up with something similar to the image below.
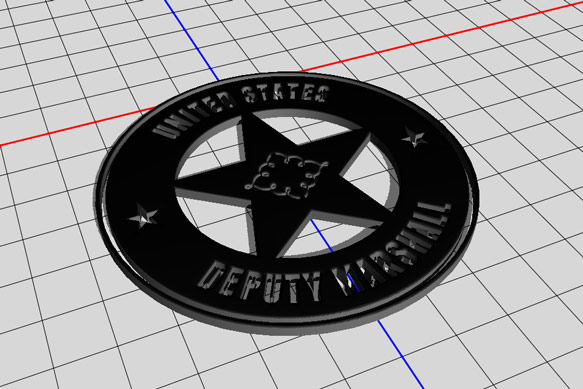
Step 10
Now we will create the material for our main 3D object. In the 3D palette, click the Front Inflation Material layer to load the material properties into the Properties palette.
Use the following basic settings for your material, I will show you the maps to use below.
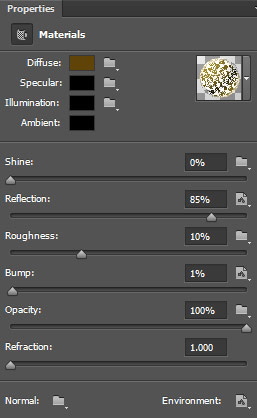
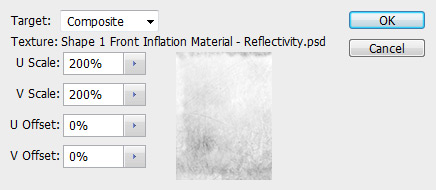
In both the Reflection and Bump slots, use this scratched metal texture. Click the texture map icon again for each slot and click "Edit UV Properties" and use the following settings.
In the Environment slot, use this black and white checkers image. No changes to the UV Properties are necessary.
Click the Material Library dropdown arrow, then the gear icon, and click New Material. Name your material and hit OK.
You may want to save your materials now because if Photoshop crashes you will have to create them again.
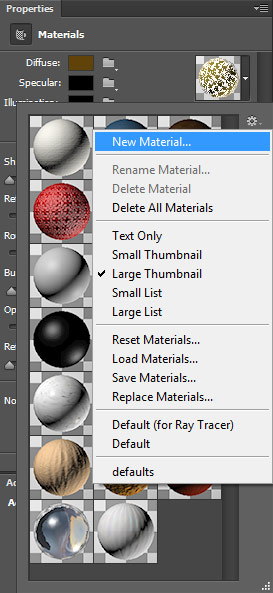
Click all 5 of the material layers for the currently visible mesh in the 3D palette, and then open your material library and click the thumbnail for the material you just created to apply it to all surfaces of your 3D object.
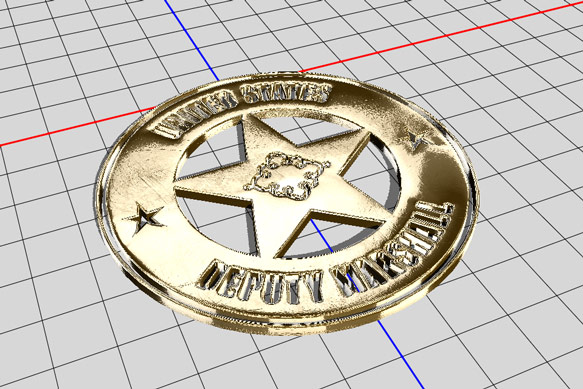
You should end up with something similar to the image below.
Step 11
Hide the current layer, and unhide your less detailed 3D objects.
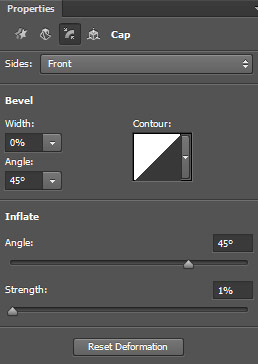
Select the 3D mesh in the 3D palette and apply the following settings to the Cap subsection in the Properties palette.
Step 12
Click the Front Inflation Material layer to load the material properties into the Properties palette.
Use the following basic settings for your material, using the same checkers image as above for the Enviroment map.
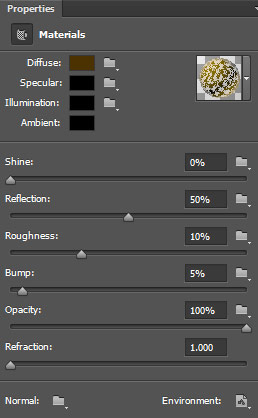
Save your material to the Material Library. You don't have to apply it to any surface but the Front Inflation Material because that is the only one that will be showing, but we did just in case we decide to change our scene in the future.
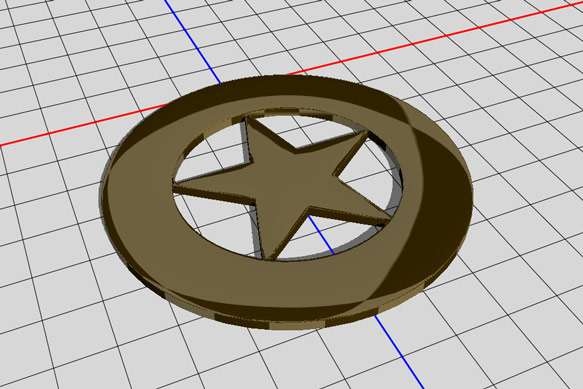
You should end up with something similar to the image below.
Step 13
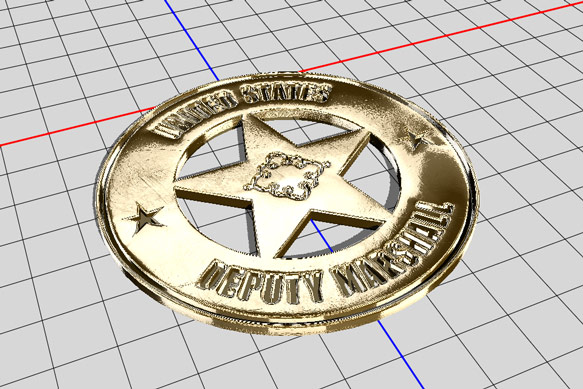
Move the current 3D object down by about 5 units, then unhide your main 3D object. This is how we create the stamped look to our text, small stars, circular border, and center flourish. It is just an object within and object, with the less detailed shape moved down a bit.
You should end up with something similar to the image below.
Step 14
To add a new ground plane, you will first need to revert your scene back to the default view. Click the Default Camera layer in the 3D palette to move our camera back to the default position. You must do this because you can only merge 3D layers if the camera settings between them are the same.
Click over to your Layers palette, create a new layer, and fill it with a light gray color. Click 3D>New 3D Extrusion from Selected Layer.
Set the Extrusion Depth to 1 and rotate the plane 90 degrees like we did previously with our other 3D objects.
Select both 3D layers in the Layers palette and click 3D>Merge 3D Layers to merge the new ground plane with our other objects.
In your 3D workspace, move the new plane we created so that our badge sits on top of it. Feel free to rotate and move the camera again to get a better perspective.
Resize the ground plane so that it extends beyond your camera frame using the Coordinates subsection of the Properties palette. We set the X and Y Scale coordinates to 200%. They change to 199.9% for some reason, but that is not important.
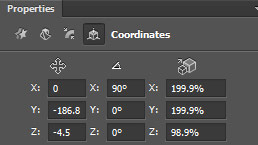
You should end up with something similar to the image below.
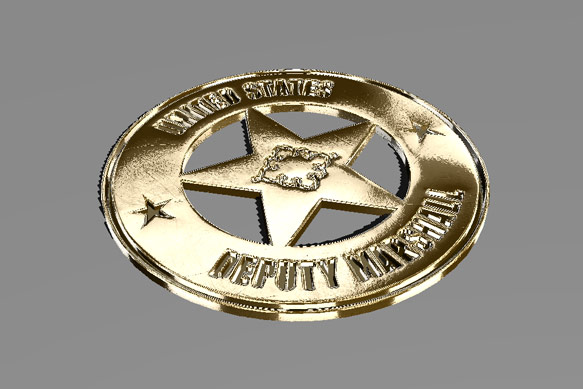
Step 15
Using the same method as we did earlier, create and apply a wood material to our ground plane, using the settings below.
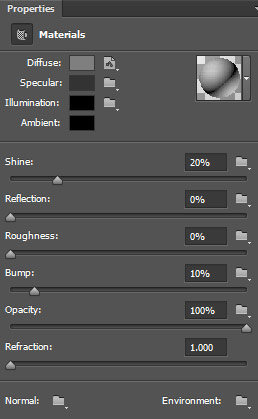
In the Diffuse slot, we used a seamless wood texture from our Wood Textures Pack 1, but any seamless wood texture will work. Set the UV Properties scale to 200% in both directions.
You should end up with something similar to the image below.
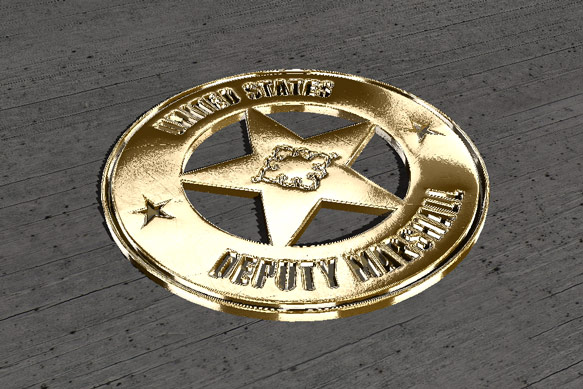
Step 16
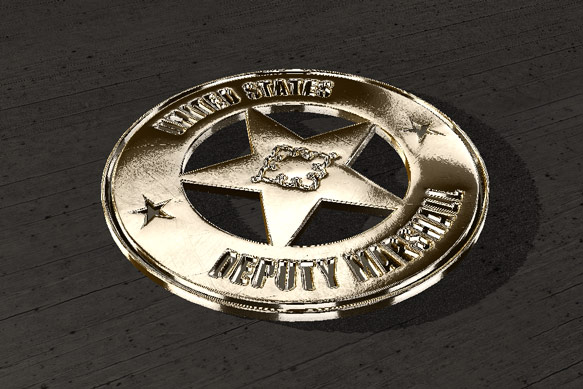
To set our scene lighting, click the Infinite Light 1 layer in the 3D palette. Click and drag the light handle in your 3D view to rotate your light until it is coming from the back left of your object at a low angle.
Apply the following settings in the Properties palette.
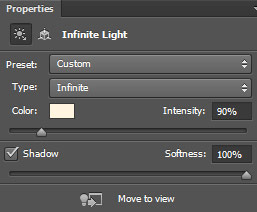
You should end up with something similar to the image below.
Step 17
Lastly, we will set the depth of field for our camera. Click the Current View layer in the 3D palette and apply the following settings in the Properties palette.
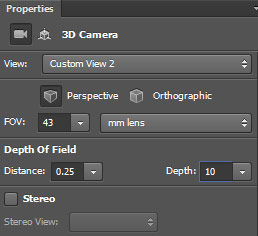
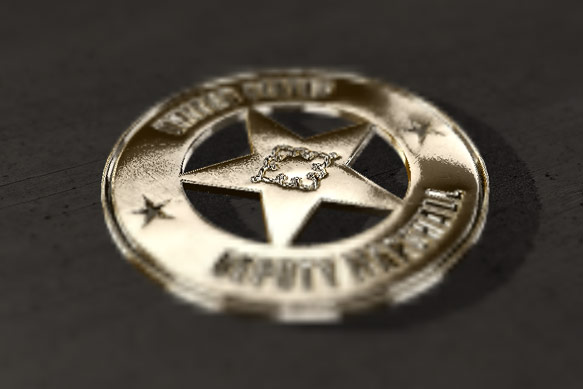
The Distance is what sets the focal point of our image. You may need to adjust the Distance for your image depending on your camera view.
Click in the Distance box and use your mouse scroll wheel, or your keyboard Up and Down arrow keys to make adjustments. If you have a decent graphics card, Photoshop will show you a preview of where your focal point will be.
You should end up with something similar to the image below.
Step 18
Make any camera or lighting adjustments as you see fit.
Click 3D>Render, or press CTRL+ALT+SHIFT+R to render your final scene.
Once the render is complete, click back to the Layers palette. Create a new layer and fill it with any color.
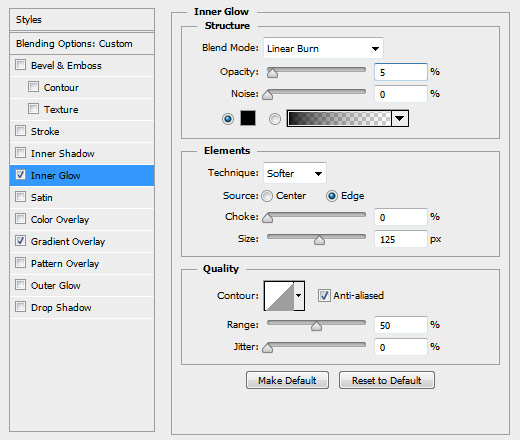
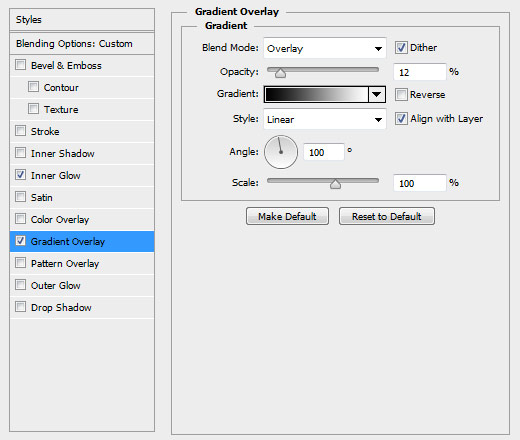
To add some additional lighting effects, set the Fill for the new layer to 0% in the Layers palette, and apply the following Layer Styles settings.
Final Image
What do you think? Did you ever imagine you would be doing this type of 3D work in Photoshop? Show us what you came up with!

