Quick Reflective Glowing 3D Text Effect
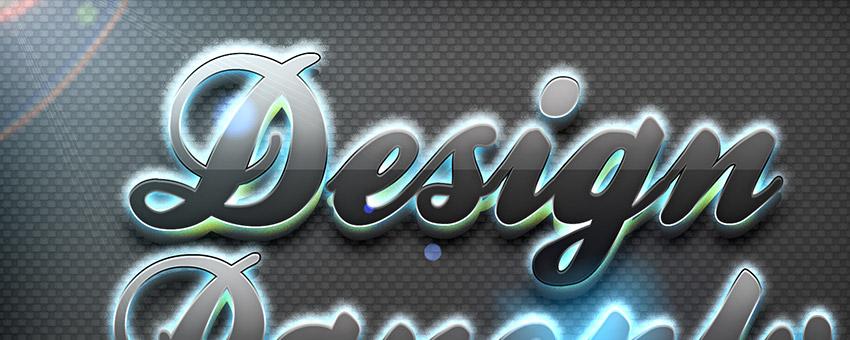
Creating unique text effects for every new project can be a daunting task, so it's always good to learn new tips and tricks to help stir up some inspiration.
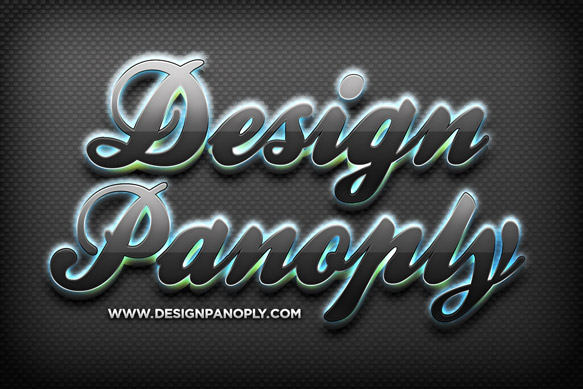
This tutorial uses Photoshop styles, multiple layers, and lighting effects to create a reflective, glowing 3D text effect in very little time. The end result can be tweaked for a few different looks as well, making it a versatile tool for the future.
What We Will Be Making
Step 1
Create a new document with dimensions of 1920 x 1280 pixels. Double click the background layer to unlock it and fill it with a medium gray, we used #565656. Double click it again to open the Layer styles dialog. Apply the following settings to create our background, using the "Woven Wide" pattern from the default Photoshop "Patterns" collection.
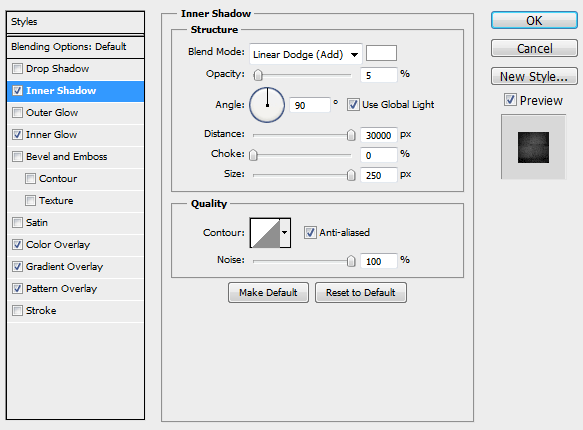
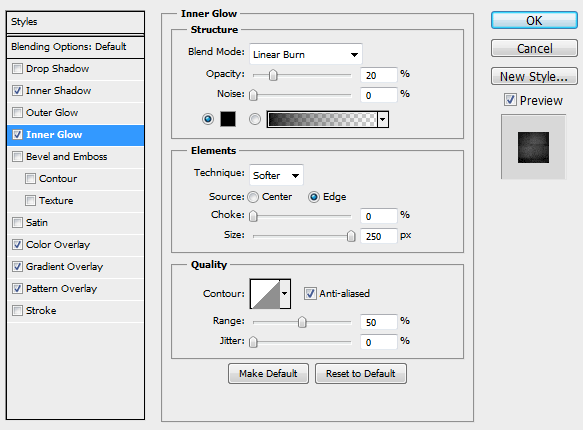
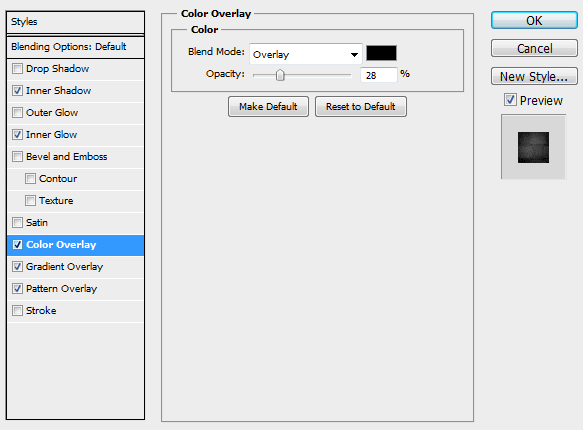
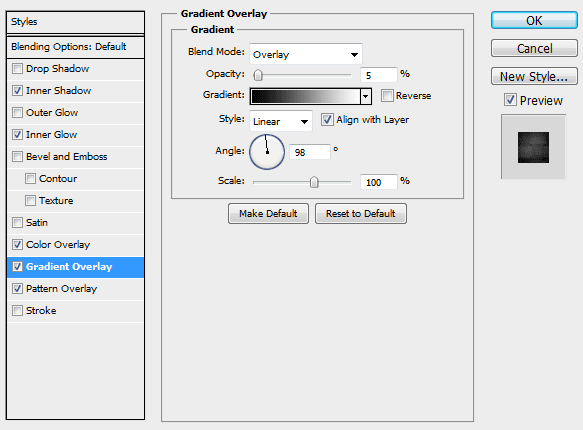
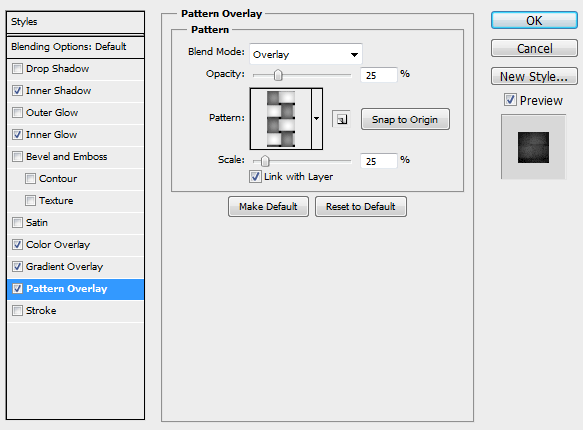
You should end up with something similar to the image below.

Step 2
Create some large title text for your image. If you are creating text on multiple lines, make sure each line of text is a separate text layer or the layer styles we use won't look right. We used the font Ballpark Weiner at 460pt.
You should end up with something similar to the image below.

Step 3
Duplicate your text layer(s). Recolor the bottom layer(s) to distinguish them from the front and move them down about 30 pixels.
You should end up with something similar to the image below.

Step 4
Apply the following layer style settings to the top text to create our reflective, glowing surface. Feel free to choose different colors for the gradient if you want something other than black text.
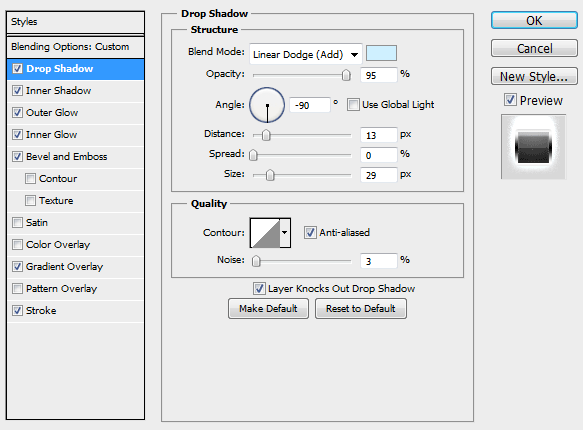
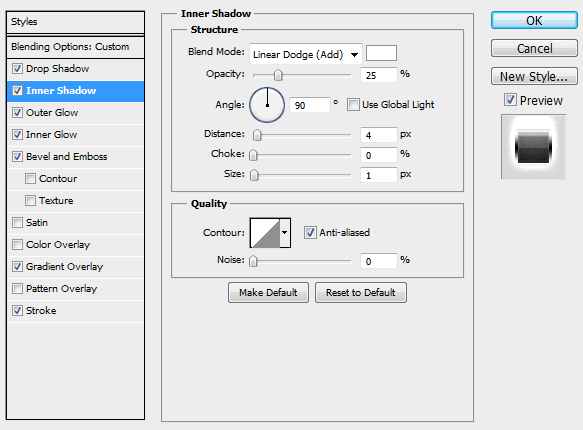
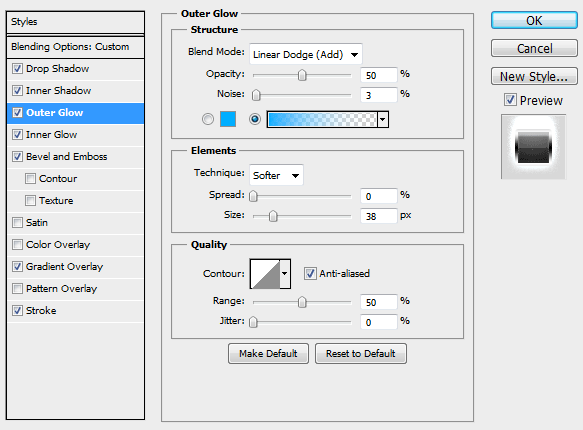
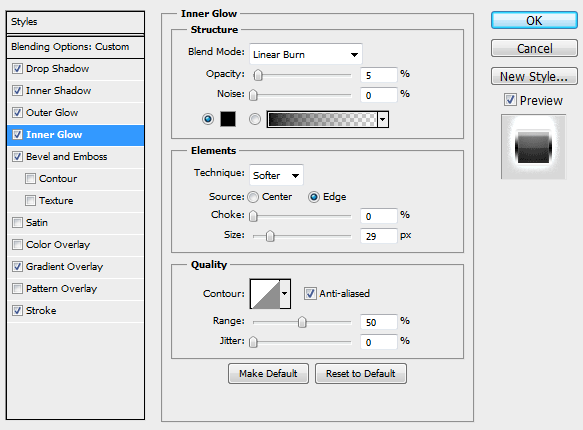
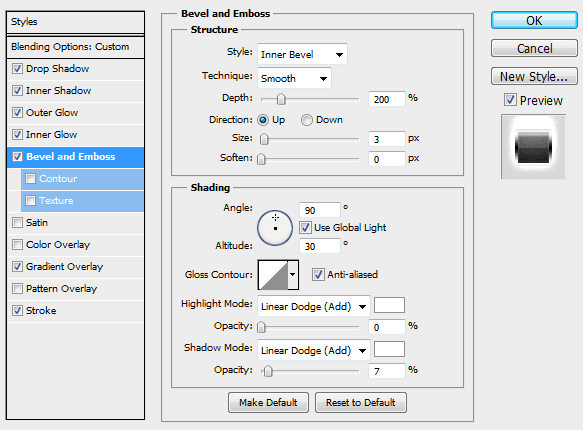
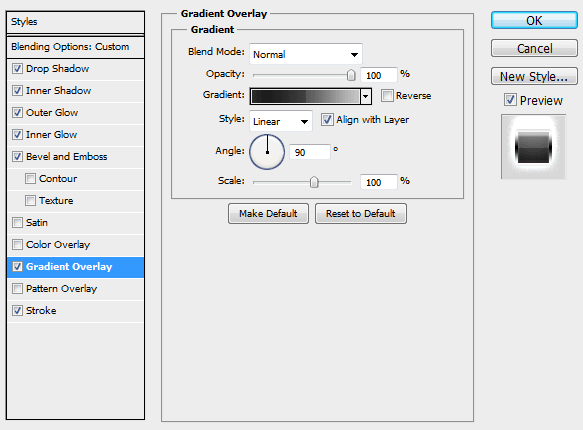
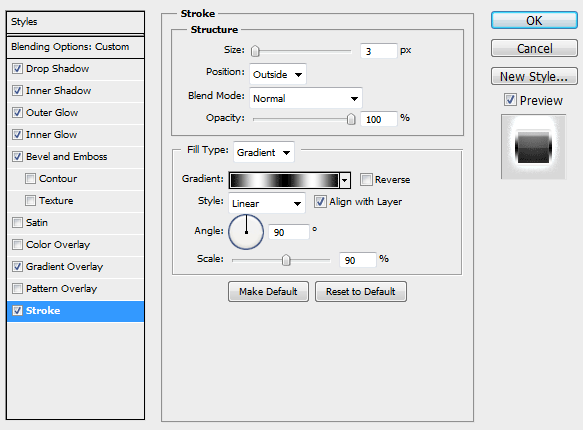
You should end up with something similar to the image below.

Step 5
Apply the following layer style settings to the bottom text to add some additional depth and lighting effects. The color we used as the color overlay is #181818.
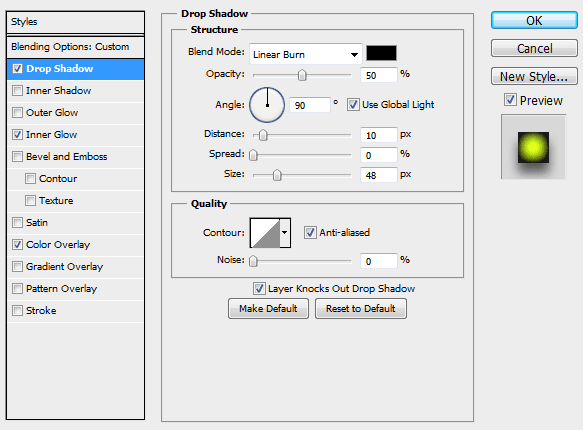
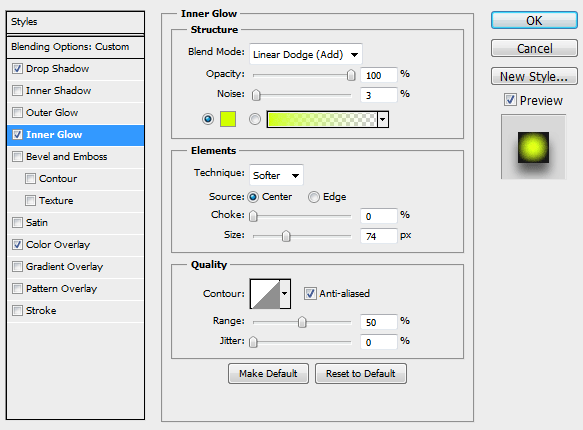
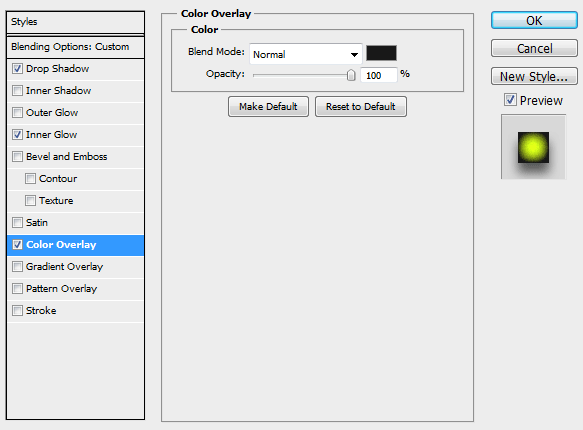
You should end up with something similar to the image below.

Step 6
Create some smaller subtext and apply the following layer style settings to give it some depth without making it stand out too much.
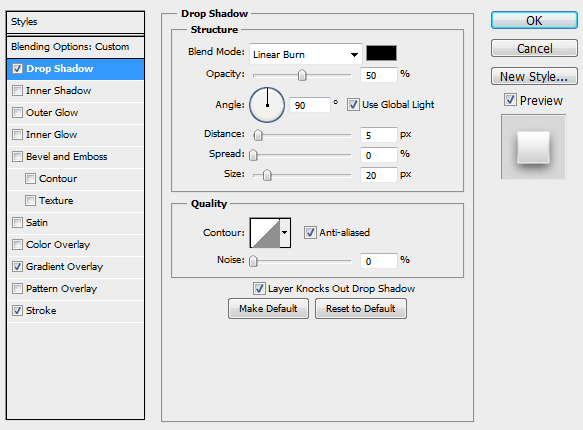
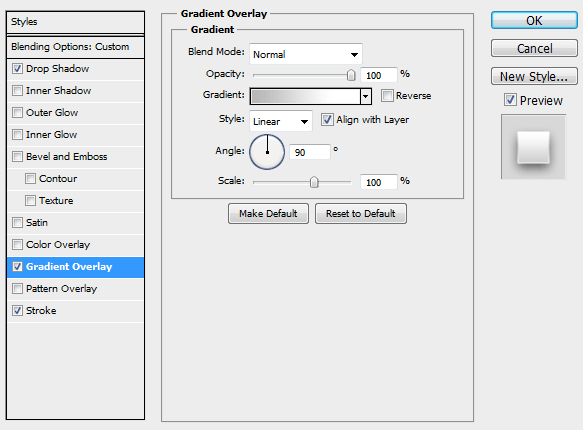
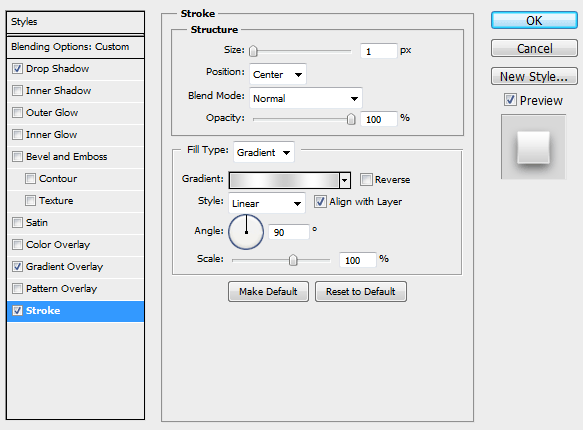
You should end up with something similar to the image below.

Step 7
Create a new layer above all the rest and fill it with a medium gray. Click Filter > Render > Lighting Effects and use settings similar to those below.
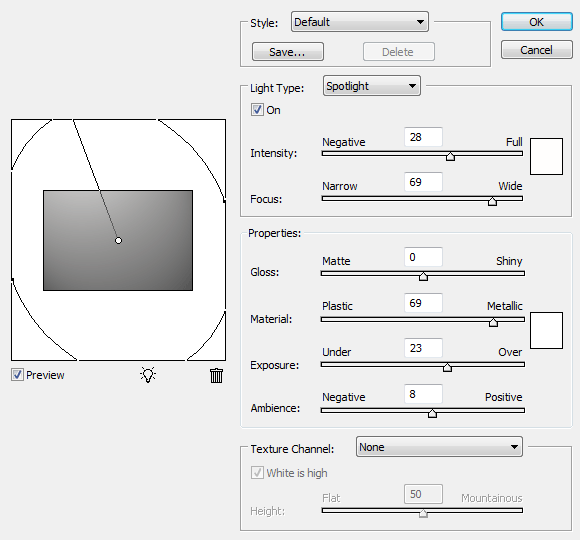
Set the layer Blending Mode to Overlay in the Layers palette.
You should end up with something similar to the image below.
Step 8
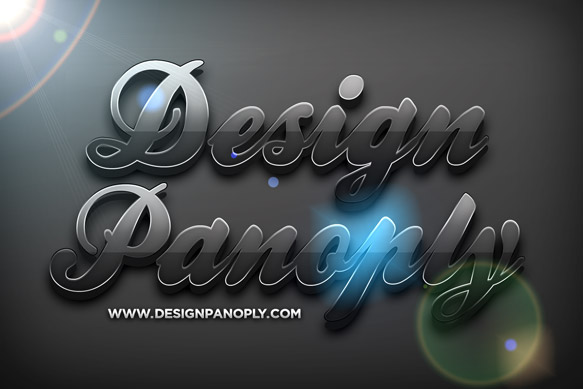
*Note: For the lens flare we are using Knoll Light Factory for Photoshop by Red Giant Software, but you can use Photoshop's built in lens flare under Filter > Render > Lens Flare the same way.
Create a new layer and fill it with black. Click Filter > Digital Anarchy > Knoll Light Factory (or Filter > Render > Lens Flare) and click the upper left corner of your image to set the lens flare position.
We used the default "35mm" preset that comes with the software, but feel free to play around to get the look you want.
Set the layer Blending Mode to Linear Dodge (Add) in the Layers palette.
Final Image
Alternate Images
By simply changing some of the layer style settings, along with the background, you can create entirely different moods for your design.

How did you like the tutorial? Show us what you came up with on our Facebook page!

